Safety Valve
.....is your valve working safely?
Getting to know your Safety Valve
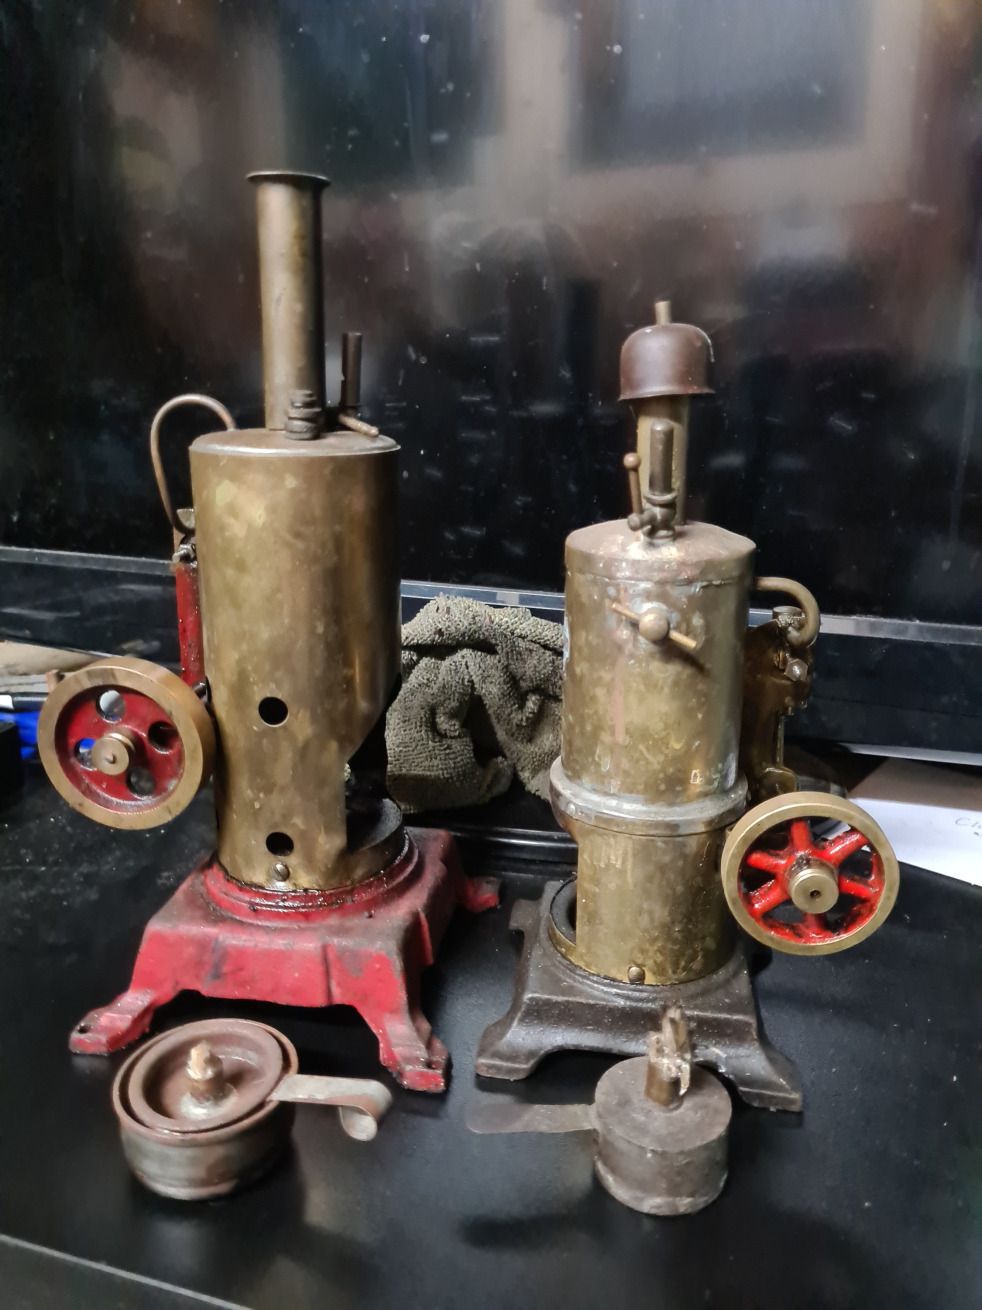
The safety valves found on old Australian or New Zealand made model engines tend to be simple devices consisting of a spring loaded plunger, and due to their simplicity they tend to provide years of trouble free operation. However with age, lack of use, and the build up of dirt and/or corrosion the valves will stop working correctly. A stuck safety valve isn’t safe. Although more often than not they're more likely to develop steam leaks that while only small and hard to see can be enough to make an otherwise good engine run poorly or even not run at all. Guaranteed to spoil your enjoyment of this hobby.
Unfortunately there are no commercial shops selling replacement safety vales for these old engines. However due to their simplicity, the safety vales are relatively easy to service and something that every model steam enthusiast will want to become familiar with.
The author of this beginners guide to safety valves takes no responsibility for any injury resulting from the reader following these instructions.
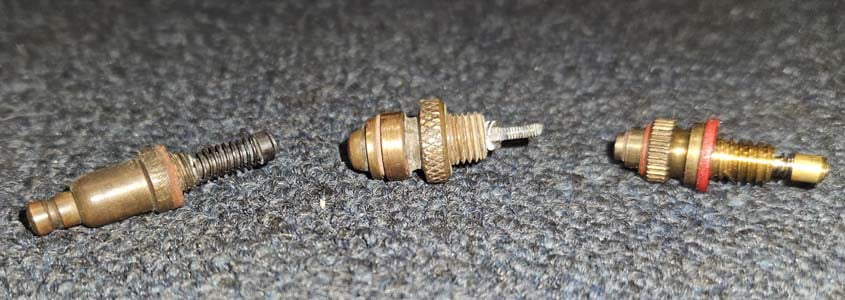
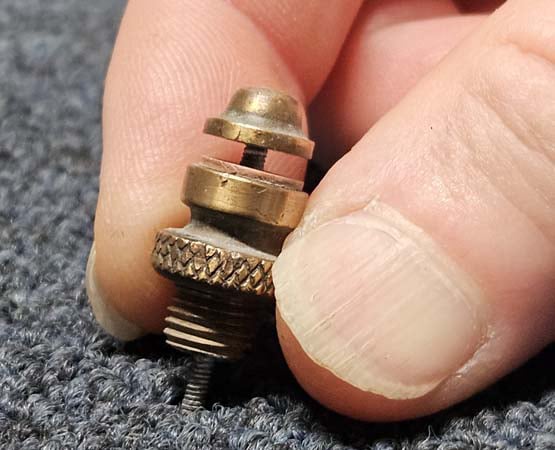
Above photo shows examples of safety valves found on old Australian and New Zealand steam toys. (L-R) Renown, Brimo, and Steamco.
While the safety valves on the various brands of steam engines may look different, most of this difference is cosmetic, with each engine manufacturer having their own unique styling. However one thing that is specific to each brand is the size and type of screw thread with many of these older engines using old style screw threads such as BA or BSF. Don’t try to force the wrong type of screw or a safety valve from a different brand engine into your boiler or you’ll end up damaging the screw threads in the top of the boiler. It will then become a much more complicated repair job.
Common problem areas:
• the seal between the valve and boiler will perish
• the sealing surface at the top of the valve will perish or become dirty/damaged
• the spring may become weak
• the spring may rust (if a steel spring has been used)
• The spring or valve shaft can seize from corrosion or a build up of dirt
First make a visual inspection of the valve. Does the spring look ok or is it covered in corrosion? Is there any obvious physical damage to any parts of the valve that could affect it’s operation?
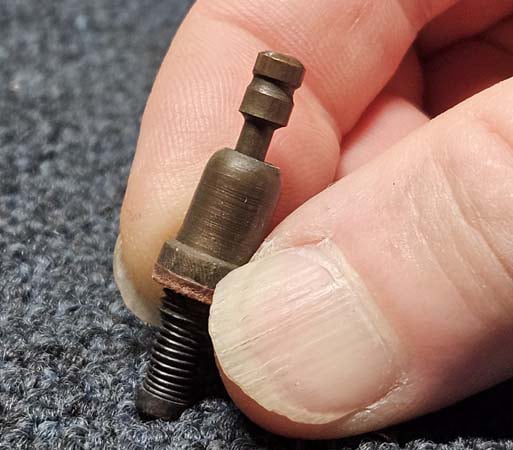
You’ll sometimes find the bodies of the steam valve scored by heavy pliers use, but as long as it’s on the outside of the main body and not the plunger it shouldn’t interfere with the valve operation.
Next check if the valve mechanism opens. This is easily done by pushing on the bottom of the valve plunger to see if it will move upwards. You should also feel some resistance from the spring.
If it doesn’t move, it could be the spring has rusted or someone has adjusted the bottom tension nut so tightly that the plunger can’t move. For a light build up of corrosion you could try WD40. In the case of a badly rusted spring that wont budge the only real fix will be to dismantle the valve, clean the parts and replace the spring with one made from either stainless steel or brass.
A rusted spring will continue to rust and cause ongoing issues.
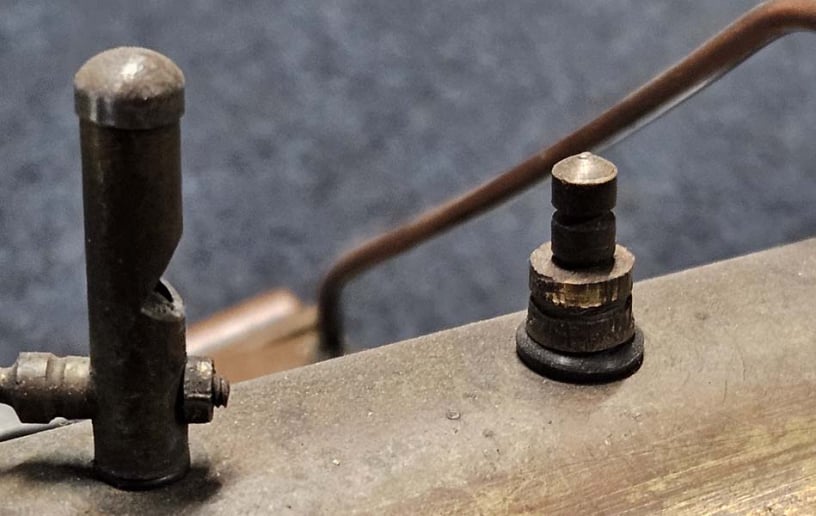
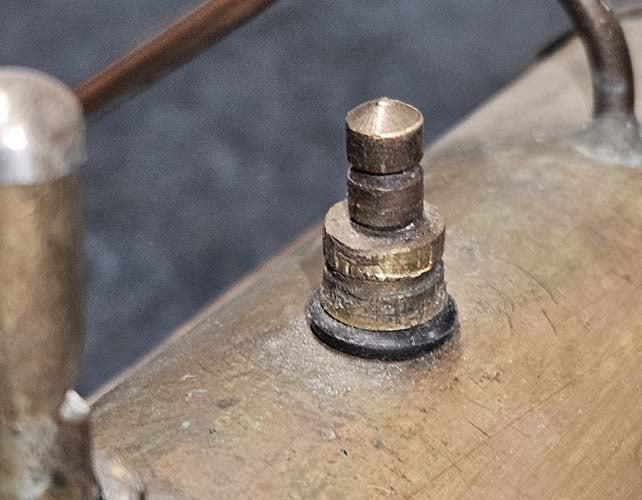
If your valve has passed the visual inspection, the next item to look at are the seals. Every valve has two seals, and they are both potential steam leakage points.
There’s a seal on the bottom of the valve that seals the base of the valve against the top of the boiler. Typically these would have originally been fibre washers, or rings of thick gasket paper, and if your seal looks a little worse for wear, or you know that it leaks, it’s just a simple case of replacing it with a similar sized item. A modern alternative, and one that’s a favourite option for the author is to use a rubber o-ring. An o-ring being flexible doesn’t need to be tightened anywhere near as hard to form a good seal as a fibre washer, and therefore places less stress on the threads in the top of the boiler.
For many of the older engines the top seals of the safety valves are achieved by the metal plunger pressing directly onto the top surface of the metal valve body. If you find you have a continual leak here then you can re-seat the mating surfaces with a bit of metal polish (Autosol or Brasso are common brands). Apply the metal polish between the mating surfaces and then rotate the two parts backward and forwards against each other till you achieve a smooth mating surface. I’ve been informed that toothpaste will also work as substitute.
There may be situations where no amount of polishing will get a damaged valve to seal. Depending on the design of the valve it’s sometimes possible to insert a small o-ring under the head of the plunger.
If you need to replace the spring, a number of handy sources for suitable replacement springs can be found in many households such as in old nasal spray dispensers and asthma inhalers, with the added bonus that these tend to be stainless steel springs that wont rust.
Another source for springs are old pens, but the springs are often steel so will rust if used in a boiler.
If you’ve had to dismantle your valve, replace the spring, or your old spring has lost tension, then you’ll need to re-calibrate the safety valve. This is done by tightening or loosening the small nut that holds the spring in place. The only truly accurate way to do this is with a pressure testing rig, which will be beyond most hobbyists.
A technique mentioned in the book “Building Simple Model Steam Engines” by Tubal Cain (page 60), involves pressing the safety valve against a set of kitchen scales and watching till the valve just starts to open, a downward force of 2-3 ounces should achieve a steam release pressure of 10-15psi.
A technique used by the author is to use a safety valve from a reasonably new steam engine such as from Wilesco as a calibration piece. Holding the stems of the modern valve and vintage valve together, push the two valve stems together slowly and watch when each valve starts to open. Adjust the vintage valve so it opens at the same time or just a fraction sooner. Working slowly it’s possible to achieve a reasonably close pressure setting. One or two PSI difference will be close enough.
If you need further help then please don’t hesitate to ask for help on the Model and Toy Steam Forum where other enthusiasts will be able to offer further help and suggestions.